How to Choose Concave Herringbone Conveyor Belts?

Time:2026-09-24 Author:Isabella
0%

Selecting Concave Herringbone Conveyor Belts requires more than comparing rubber grades or purchase prices. The belt must match the material, conveyor geometry, loading pattern, and operating environment. A steep incline, wet aggregate, or irregular feed can expose weak design choices quickly. Small details matter.

Industry reports show why this decision deserves careful engineering. Grand View Research identifies continued growth in global conveyor-belt demand, driven by mining, construction, logistics, and bulk-material handling. MarketsandMarkets also highlights automation, higher throughput, and reduced maintenance as major purchasing influences. These reports provide useful direction, but their market estimates vary by methodology and region. They should guide questions, not replace field measurements.

R. Todd Swinderman, a recognized conveyor-engineering specialist, is often associated with the practical principle: “Design the conveyor system around the material.” That principle applies directly to Concave Herringbone Conveyor Belts. Their raised herringbone pattern can improve grip and help retain material on inclined routes. However, profile height, pitch, belt width, pulley diameter, and cleaning access still require verification. A belt that performs well with dry coal may struggle with sticky clay. That is an easy mistake.

This guide examines traction, carrying capacity, splice strength, wear resistance, noise, and total lifecycle cost. It also considers real installation conditions, including belt mistracking, impact loading, moisture, and temperature changes. Technical datasheets are valuable. Site experience is better. Even experienced teams can overlook one transfer point, and that omission may decide whether the belt operates reliably or demands repeated correction.
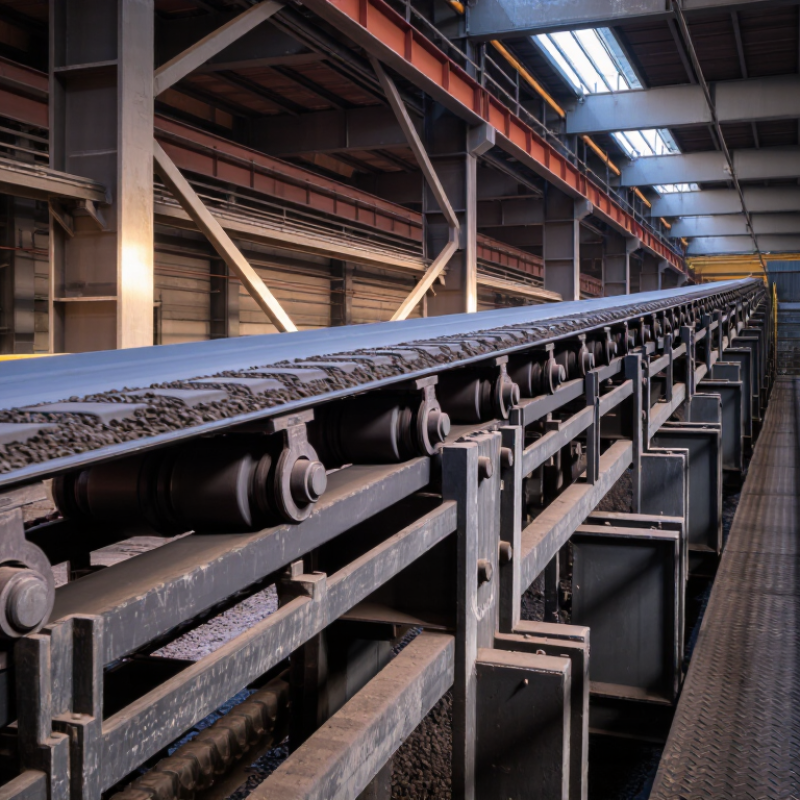
How to Choose Concave Herringbone Conveyor Belts?

Understanding Concave Herringbone Conveyor Belt Design and Function

A concave herringbone conveyor belt combines a trough-like profile with angled ribs. The concave shape keeps loose material near the belt center. Herringbone ribs improve grip and guide particles during elevation. They also help control sideways movement on damp or uneven loads.

Pattern depth matters. Shallow ribs suit fine material, while deeper ribs hold larger lumps more securely.

According to Grand View Research’s 2024 market report, the global conveyor belt market reached about USD 5.48 billion in 2023. It is projected to grow at roughly 4.9% annually through 2030. This growth reflects wider use in mining, recycling, agriculture, and bulk handling. Yet market growth does not make every belt suitable. Selection still depends on belt width, incline angle, material density, moisture, and operating speed.

CEMA design guidance links conveyor capacity with belt width, speed, and bulk density. These factors should be checked before choosing the rib profile. A belt that looks aggressive may damage fragile products. Wet fines can also collect inside the herringbone channels. Field inspections often reveal this problem after installation. Check pulley diameter, splice quality, tracking, and cleaning access. I would also test the belt under real load, not only in an empty trial. Small design assumptions can become costly maintenance problems.

Identifying Material Handling Needs and Conveyor Operating Conditions

How to Choose Concave Herringbone Conveyor Belts?

Choosing a concave herringbone conveyor belt starts with the material, not the belt catalog. Observe the load before specifying anything. Is it dry grain, damp sand, crushed stone, or packaged goods? Each material behaves differently on a moving surface. Fine powder may settle between the pattern ribs. Wet material can become slippery and heavy. Sharp fragments may cut the belt cover during loading.

Record the material’s bulk density, particle size, moisture, temperature, and expected volume. Note whether the conveyor runs horizontally or on an incline. Herringbone ribs can improve grip and help guide bulk material toward the center. However, an aggressive pattern may retain sticky material and complicate cleaning. The concave profile should support the load without allowing material to spill over the edges. Small details matter here.

Check the conveyor’s belt width, trough angle, pulley diameter, speed, loading method, and transfer-point design. A belt may carry the stated weight but still fail at a poorly aligned loading zone. Measure impact height and inspect where material first touches the belt. Keep it realistic. Laboratory capacity is not the same as daily performance. I would also test a short belt section with the actual material, because dust, moisture, and temperature can expose weaknesses that calculations miss. Safety guards, emergency stops, tracking systems, and routine inspection access should be considered before installation.

Selecting Belt Dimensions, Materials, and Herringbone Pattern Specifications

How to Choose Concave Herringbone Conveyor Belts?

Selecting a concave herringbone conveyor belt starts with its working dimensions. Measure belt width, conveyor length, trough depth, pulley diameter, and carrying capacity. The belt must sit naturally in the concave frame. A forced curve can create edge lifting and uneven wear. Grand View Research estimated the global conveyor belt market at approximately USD 6.8 billion in 2023, with continued growth through 2030. This expansion increases demand for accurately specified, application-focused belts.

Material selection depends on temperature, moisture, oil exposure, and cleaning chemicals. PVC suits many dry conveying duties, while polyurethane offers smoother surfaces and stronger resistance to abrasion. Rubber remains useful for heavier loads and impact. For food handling, verify the material’s regulatory suitability instead of trusting a generic “food grade” statement. ISO 14890 provides useful requirements for conveyor belt dimensions and physical performance, but it does not replace application testing.

Herringbone pattern specifications need equal attention. Define chevron angle, rib height, rib spacing, and pattern direction. A steeper pattern can improve grip on inclined conveyors, yet it may increase product disturbance. MHI’s 2024 Annual Industry Report identified labor and productivity pressures as major automation concerns, making stable conveying increasingly important. Still, a neat calculation can fail in production. I would test the belt with the real product, especially irregular cartons or damp materials. Small errors matter. Monitor tracking, noise, belt stretch, and residue after several operating cycles.

Evaluating Load Capacity, Tracking Performance, and Installation Requirements

When choosing a concave herringbone conveyor belt, begin with the actual load profile. Record material density, lump size, moisture, belt speed, incline, and loading impact. A wide belt may carry more material, but only if its carcass, splice, and support system match the demand. Calculate both continuous load and short impact peaks. Do not rely on belt appearance alone. A belt carrying damp gravel at 35 degrees needs different protection from one moving dry cartons.

Tracking performance deserves close inspection. The herringbone pattern can help control material flow, but it does not correct poor alignment. Check pulley squareness, idler positioning, belt tension, and the transition from flat to concave sections. During commissioning, watch the belt near the loading zone and return rollers. Small side movements often reveal uneven tension or a skewed frame. A practical warning: excessive tension can improve tracking briefly while damaging the belt edges.

Installation details can decide service life. Confirm the belt’s running direction and pattern orientation before splicing. Measure the conveyor centerline, clean every pulley surface, and set idlers at equal angles. Leave enough space for safe splicing and future inspection. Installation should also account for belt stiffness, minimum pulley diameter, and the available take-up travel. I have seen carefully selected belts fail because the splice was rushed. That mistake is easy to repeat. A trial run with an empty belt, followed by gradual loading, exposes problems before the material flow becomes difficult to control.

How to Choose Concave Herringbone Conveyor Belts? - Evaluating Load Capacity, Tracking Performance, and Installation Requirements

Evaluation Factor What to Check Typical Engineering Guideline Effect on Selection Installation Requirement
Belt Width Material volume, loading method, and available conveyor frame width. Common widths: 400–1,200 mm for general bulk-material handling. A wider belt increases carrying capacity and reduces material depth for the same throughput. Allow sufficient clearance between the belt edges, idler brackets, skirt boards, and structural members.
Load Capacity Required mass flow, bulk density, belt speed, trough angle, and permissible loading cross-section. Typical light- to medium-duty systems: 10–250 t/h; verify by calculation. Capacity is not determined by belt width alone. A practical estimate is:
Q = 3.6 × A × v × ρ
where Q is t/h, A is loaded area in m², v is belt speed in m/s, and ρ is bulk density in t/m³.
Use a controlled feed chute to prevent impact loading, surging, and uneven distribution across the belt.
Bulk Material Density Loose bulk density, particle size, moisture content, and abrasiveness. Common design range: 0.5–1.8 t/m³; use the measured operating density where possible. Higher density increases belt tension, drive torque, skirt friction, and support-load requirements. Set skirt-board pressure carefully and provide wear liners where abrasive material contacts the loading zone.
Belt Speed Required throughput, material degradation, dust generation, and discharge behavior. Typical range: 0.5–2.5 m/s for general-purpose bulk conveying. Higher speed can increase capacity but may increase mistracking, dust, spillage, and impact at transfer points. Use gradual acceleration and confirm that the discharge pulley and scraper are suitable for the selected speed.
Herringbone Pattern Chevron or V-shaped profile height, pitch, and direction relative to the conveying incline. Profile heights commonly range from 6–20 mm; select according to particle size and incline angle. The pattern improves grip and reduces rollback, while excessive profile height can increase cleaning difficulty and pulley stress. Keep the herringbone direction consistent along the belt and ensure the profile does not interfere with scrapers or transfer chutes.
Incline Angle Material flowability, moisture, particle shape, and herringbone profile effectiveness. Often suitable for approximately 10°–25°; steeper angles require application-specific testing. A steeper incline raises rollback risk and may reduce effective capacity if the material slips or accumulates between profiles. Confirm the loading point, transition geometry, and emergency stop arrangement before commissioning.
Tracking Performance Belt alignment, splice squareness, pulley parallelism, idler condition, and loading symmetry. Maintain pulley and idler alignment within the conveyor designer’s tolerance; keep the belt centered during empty and loaded runs. Poor tracking causes edge damage, material spillage, belt rubbing, and premature failure of the splice. Install adjustable training idlers only after checking frame alignment, pulley squareness, belt tension, and centered loading.
Concave Troughing Geometry Idler trough angle, belt flexibility, material containment, and transition distance. Common trough angles: 20°–35°; use a lower angle for stiff belts or difficult transitions. A deeper trough improves containment but increases bending, edge stress, and transition sensitivity. Provide adequate transition length between flat and troughed sections to prevent edge lifting and belt folding.
Belt Tension and Strength Effective tension, start-up tension, conveyor length, incline, friction, and safety factor. Select belt strength so working tension remains below the rated allowable tension; a design safety factor of approximately 8–10 is commonly used for fabric belts, subject to belt construction and duty. Insufficient strength causes stretch, mistracking, splice failure, and permanent damage during start-up. Use a calibrated take-up system and tension the belt gradually to avoid over-tensioning bearings and belt edges.
Pulley Diameter Belt carcass construction, cover thickness, splice type, and pulley location. Use the belt construction supplier’s minimum diameter; many medium-duty fabric belts require approximately 250–500 mm or more. An undersized pulley increases flex fatigue, cover cracking, splice stress, and belt stiffness effects. Check minimum diameters for drive, head, tail, bend, and snub pulleys separately.
Belt Cover and Material Compatibility Abrasion, oil, heat, moisture, chemicals, and particle sharpness. For general abrasive bulk materials, select an abrasion-resistant cover; for hot materials, confirm the rated continuous operating temperature. The wrong cover compound can lead to rapid wear, swelling, hardening, cracking, or loss of traction. Remove sharp projections from chutes and maintain proper scraper pressure to prevent cover gouging.
Loading and Transfer Point Drop height, impact energy, feed direction, skirt sealing, and material centering. Minimize free-fall height and align incoming material with the belt direction and centerline. Off-center or high-impact loading is a major cause of mistracking, edge damage, spillage, and localized wear. Use impact idlers or a reinforced loading zone where necessary, and set skirts without pinching the belt.
Splice Method Belt thickness, carcass type, operating tension, temperature, and maintenance capability. Mechanical fasteners or vulcanized splices may be used; the splice must meet or exceed the belt’s working-tension requirement. An incorrectly prepared splice can create a high spot, disturb tracking, damage scrapers, or fail under dynamic loading. Make the splice square to the belt centerline and verify profile continuity across the herringbone pattern.
Maintenance Access Inspection points, cleaning equipment, take-up travel, guarding, and replacement space. Provide safe access to the head, tail, loading zone, return rollers, take-up, and emergency-stop devices. Accessible components reduce downtime and allow early correction of tracking, wear, and tension problems. Install guards, pull-cord switches, lockout points, and safe walkways in accordance with applicable regulations.

Selection note: The stated values are general engineering starting points rather than guaranteed operating limits. Final belt selection should be verified using the actual material density, particle size, moisture, conveyor length, incline, duty cycle, belt construction, and local safety requirements.

Comparing Suppliers, Maintenance Needs, and Total Operating Costs

How to Choose Concave Herringbone Conveyor Belts?

Supplier selection should begin with operating evidence, not a low purchase price. Ask for carcass specifications, rubber grade, splice methods, test reports, and comparable installation references. A reliable supplier should explain belt width, trough angle, load conditions, and herringbone pattern suitability. Request realistic lead times and written warranty terms. Vague answers can become expensive later.

Maintenance needs depend on material, moisture, speed, and loading impact. Inspect the belt weekly for edge damage, cracking, uneven wear, and trapped material between the pattern ribs. Check alignment and tension during every planned shutdown. Poor tracking can damage pulleys within days. Cleaning also matters, especially when wet fines harden inside the concave profile. We once underestimated buildup near a transfer point. The belt looked healthy, but its return side was already suffering.

Total operating cost includes energy use, labor, spare parts, downtime, and disposal. A stronger belt may cost more initially, yet reduce emergency splices and production losses. Compare expected service life using actual tonnes moved, not calendar months alone. Calculate the cost of one hour of stoppage. That figure often changes the supplier ranking. Do not rely only on spreadsheets, though. Site conditions are rarely perfect, and maintenance teams may have limited inspection time. A practical evaluation should combine supplier data, operator experience, and a cautious allowance for unexpected repairs.

How to Choose Concave Herringbone Conveyor Belts?

Comparing supplier categories, maintenance needs, and estimated total operating costs for a 10-meter conveyor over a three-year period.

The comparison uses typical industrial benchmark estimates in USD for a 10-meter concave conveyor belt system operating approximately 4,000 hours per year. Total operating cost includes the initial belt purchase, routine maintenance, replacement splicing, and expected belt replacement during three years. Actual costs vary with belt width, load, speed, material abrasiveness, and installation conditions.

FAQS

What measurements should I take before choosing a concave herringbone conveyor belt?

Measure belt width, conveyor length, trough depth, pulley diameter, and carrying capacity. The belt should rest naturally inside the frame. A forced curve may lift the edges and cause uneven wear.

Which belt material suits different operating conditions?

Choose materials according to temperature, moisture, oil, cleaning chemicals, and impact. PVC often suits dry conveying. Polyurethane handles abrasion and offers a smoother surface. Rubber supports heavier loads and impact.

How should I select the herringbone pattern?

Define the chevron angle, rib height, rib spacing, and pattern direction. A steeper pattern can improve grip on inclined conveyors. However, it may disturb loose or fragile products. The calculation may look perfect but still fail in production.

Should the belt be tested with the actual conveyed product?

Yes, especially with irregular cartons or damp materials. Test loading, tracking, noise, stretch, and residue. Use real operating cycles. Small errors matter.

What information should I request from a belt supplier?

Request carcass details, rubber grade, splice methods, test reports, and similar installation references. Ask for realistic delivery times and written warranty terms. The supplier should explain width, trough angle, load conditions, and pattern suitability. Vague answers are costly later.

How often should a concave herringbone belt be inspected?

Inspect it weekly for edge damage, cracks, uneven wear, and trapped material. Check alignment and tension during every planned shutdown. Inspect transfer points carefully. Buildup can hide damage underneath.

What cleaning and maintenance problems should I watch for?

Wet fines may harden inside the concave profile and pattern ribs. Poor tracking can damage pulleys within days. Clean return surfaces and transfer areas regularly. We once underestimated buildup near a transfer point. That judgment was wrong.

How can I compare the total operating cost of different belts?

Include energy, labor, spare parts, downtime, and disposal costs. Compare service life by actual tonnes moved, not calendar months alone. Calculate the cost of one stopped hour. A higher purchase price may reduce emergency repairs. Spreadsheets are useful, but incomplete.

Conclusion

Choosing the right Concave Herringbone Conveyor Belts begins with understanding how their curved profile and angled herringbone pattern guide materials toward the center, helping reduce spillage and improve conveying stability. First, assess the material being transported, including its size, weight, moisture, temperature, and abrasiveness, along with the conveyor’s length, incline, speed, and operating environment. These factors will determine the appropriate belt construction and performance requirements.

Next, select suitable belt width, thickness, carcass material, cover compound, and herringbone pattern dimensions based on the expected load and conveying conditions. Evaluate load capacity, tracking performance, belt flexibility, and compatibility with the conveyor structure before installation. Supplier comparison should include product consistency, technical support, lead time, and replacement availability. Finally, consider cleaning, inspection, tension adjustment, and repair needs, as well as energy use and service life. A belt with a reasonable initial price may be less economical if it requires frequent maintenance or replacement, so total operating cost should guide the final decision.


Isabella

Isabella

Isabella is a dedicated marketing professional with a sharp focus on driving brand growth and engagement through strategic content creation. With an extensive background in digital marketing, she combines her passion for storytelling with her keen understanding of industry trends to deliver......